PNGTube Online
_____
PNGTube for the Complete Noob
So you've found PNGTube... welcome! But now what?


Make a PNGTuber of course!
But how do I do that?
1) Getting Started
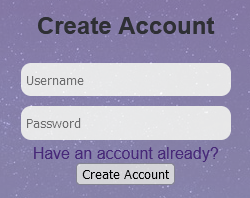
First off, go ahead and create an account on the homepage. You don't need an account to use PNGTube, but you won't be able to save your PNGTubers if you don't. All you need to join is a username and password.
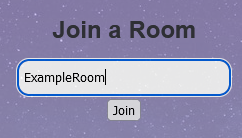
Now, join a room! The form is right next to the account creation one on the homepage. What you put here decides what PNGTuber room you join; if you're playing with friends, you'll all want to join the same room. Otherwise, you can put whatever you like here. Don't worry about picking a "valid" room name; new rooms are created automatically as you join them.
2) PNGTube Room Basics
Rooms are where you'll find PNGTube's main functionality. What's all this junk?
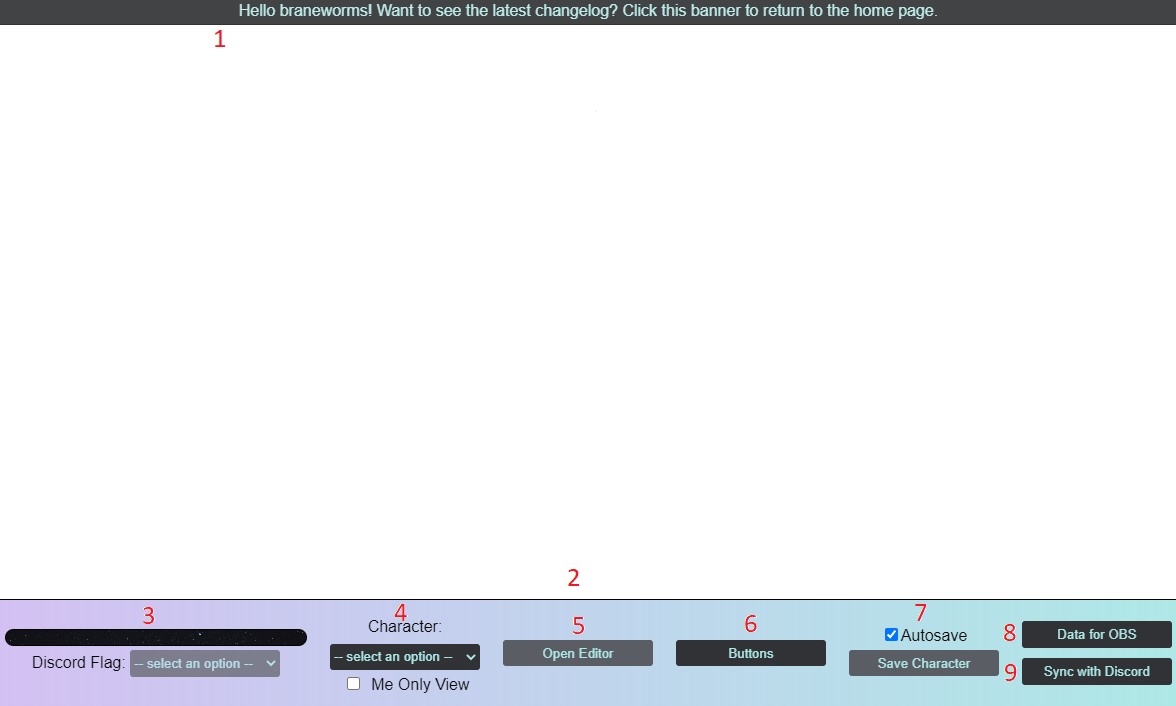
- The Banner displays your username and is also a quick link back to the homepage. If there are any major alerts, they'll also be displayed here.
- The Control Bar holds all the tools you'll need to make and edit a PNGTuber. If you're on mobile or a small browser window, this can be scrolled horizontally to access all options.
- This is the Audio Visualizer. PNGTube will ask to access your microphone to control your 'Tuber, and here you'll be able to see your volume level and control volume sliders.
- The Character Selection Dropdown lets you load in a PNGTuber or create a new one from scratch. PNGTubers are tied to
your account, not the room, so any 'Tubers you make will be accessible in any room.
Me Only View tells PNGTube to display only your character on your browser. It doesn't have any effect in single player but can be useful on mobile or in a small browser with friends. - Once you've loaded in a PNGTuber, the Open Editor button toggles the Editor menu.
- This button opens and closes the Buttons box. Buttons are one way to change your PNGTuber's state (toggling emotions, anyone?), and as they're made, they'll pop up in here.
- The Save Character button saves any changes you've made to your PNGTuber to PNGTube's server. Autosave is on by default when the page loads.
- The Data for OBS button toggles a menu displayed fields for using PNGTube in OBS. If you're running a stream, just copy and paste into a browser source! This can be used in other streaming programs as well, though the field names may be different.
- Did you know PNGTube has a Discord bot? Just invite it to your server and voice chat and click the Sync with Discord button to let Discord take over your volume input. There's a bit more nuance to it than this, but we'll cover it in a later guide.
3) Making a PNGTuber
There's a lot of tools here! For now, though, you only really need 2: the Character Selection Dropdown and Open Editor button.
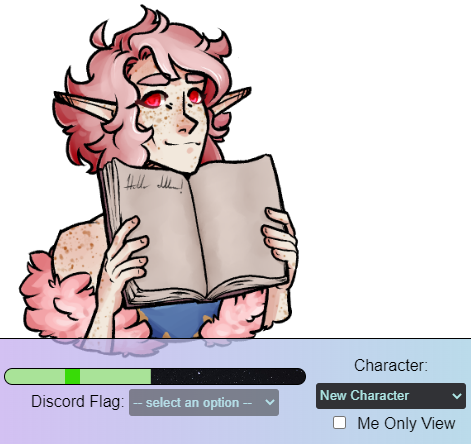
In the dropdown, select New Character. A default Syrinx of your very own should appear on the screen. At this point, PNGTube might ask you to use your mic (select Allow), and the Audio Visualizer will start showing your audio levels. ...And there you are, you're all done!
At this point, you could pop your OBS data into OBS and start streaming. Syrinx will change appearance from Idle to Talk depending on your volume. Feel free to tune this Idle/Talk threshold with the green volume slider in the Audio Visualizer.
4) Editor Basics
But Elliot, you say, I made all this cool art of my character to use, and unfortunately my character isn't Syrinx!
It's okay, not all of us can be Syrinx.
First, go ahead and give your PNGTuber a name by hitting the Save Character button in the Control Bar. A name field should pop up, and you can enter a name and hit Save Character again to complete the process. Don't worry if you forget this step-- if PNGTube tries to save a PNGTuber without a name, it will prompt you for one.
Okay, let's get editing! To make changes to your PNGTuber, we can do so with the Editor. Go ahead and open it by clicking the Open Editor button. You should see a simple, default State Machine like this one:
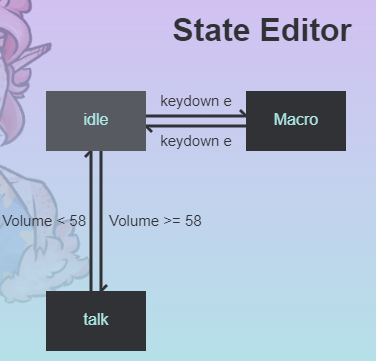
If you've ever taken a computers or logic class, this functions exactly like its namesake. Otherwise, don't worry! This guide will walk you through everything you need to know.
Inside the Editor, we see two kinds of things we can interact with: nodes and paths.
Nodes are the big rectangles and describe your PNGTuber's behavior at any point in time, including their image, animation, and other options. Your PNGTuber's current node is highlighted; here, we can see Syrinx is currently at idle. There are two kinds of nodes: states and macros. States are the most basic form of a node just as described above, and macros are nodes that contain one or more other nodes. For now, we'll just focus on states.
Paths are the arrows and are how your PNGTuber advances from node to node. The arrow head points to where the path leads to, and the text next to the path tells under what condition the path is taken. For example, when Syrinx is in the idle state, he will change to the talk state if my volume is at or above 58%. If I press down the 'e' key, he'll change to Macro. Otherwise, he'll stay idling!
For the simplicity of this tutorial, we'll stick to creating a simple PNGTuber that idles and talks with your voice.
4.1) Editor Basics
If you hover over a node, you can see the options for editing it.
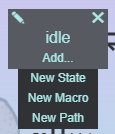
✖: Deletes the node.
✎: Opens the editing menu for the node.
Add...: Toggles the dropdown shown: New State and New Macro create a new node of their type in the machine.
New Path creates a new path outgoing from this node, which you can place the other end of on any other node by
clicking on it.
Now, you can delete the Macro node if you don't want to goof around with it. This leaves us with a simple idle/talk state machine!
Of course, we still want to get your art into the PNGTuber, because your character isn't Syrinx. Go ahead and click the ✎ on the idle node, and a state edit menu will open in the Editor.
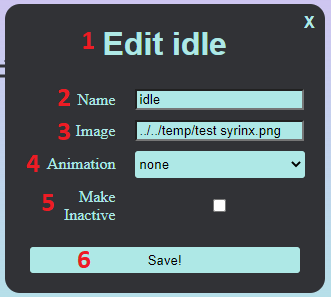
- Displays the name of the state you're editing
- The name of the state, which you can change for organizational purposes
- The image source for this state. This is what's displayed when your PNGTuber is in this state. These are links that should end in .jpg, .png, .gif, or another image format. PNGTube is not an image host-- Syrinx is an exception! Discord works great for making links: just post your image, click it, click Open in Browser, and copy and paste the link here. And yes, gifs do animate correctly in PNGTube!
- The animation your PNGTuber does while in this state. Make them hop around, shake in fear, or just sit still!
- The Make Inactive toggle puts a dark overlay over your PNGTuber while in this state, similar to your Discord avatar when you're not talking.
- The Save button, saves changes you've made to the state to the PNGTuber
Make any changes you want here, click Save!, and the menu will close automatically. Get your PNGTuber into the idle state, and see your new image! If you have issues with a broken image link, check that it ends in the appropriate file extension (.png, .jpg/.jpeg, .gif) and that the full link is in the field.
Go ahead and edit the talk state as well, draw your character with their mouth open or otherwise "talking"! If you haven't already, adjust the green volume slider on the Audio Visualizer to pick up your voice correctly. And there you have it, your first PNGTuber is complete!
5) Wrap-up and More
Ready to use PNGTube? Here's a quick link back to the homepage.
Have any issues, critique, or suggestions for PNGTube? PNGTube was created for the TTRPG group Horror and Harpy, and we have a help/update/suggestions board in our Discord. Feel free to join!